Gardening with native plants is one of the best ways to have a beautiful, low-maintenance yard. Native species are adapted to local soils, climates, and wildlife, so they typically require less water and fertilizer than non-natives, and they provide the best support for pollinators and birds. But despite all of these benefits, many gardeners find that transitioning native plants into a garden is a challenge.
In fact, one of the most common complaints from folks trying to go native is how long it takes for the plants to become established. This is the transition period after transplanting, when native plants adjust to the different conditions of a cultivated garden that can seem worlds apart from their natural habitat. While many native plants do eventually thrive, this early period can test the patience of even the most dedicated gardeners. So what is the solution to this struggle? Read on for an explanation and a real-world example.
The Challenge of Getting Native Plants Established
When gardeners first put native plants in a garden, they are often surprised that the plants seem to “stall out” or struggle for the first year or two. This is sometimes called the “sleep” stage of a “sleep, creep, leap” growth cycle common to many native perennials.
There are a few reasons for this:
1. Soil Conditions
Native plants are adapted to the specific soils of their natural habitats, so a woodland native such as trillium or Virginia bluebells will expect to find humus-rich soil with good drainage, while a prairie species like coneflowers or little bluestem is used to lean, rocky, or sandy soil. Most garden beds are more compacted, richer in nutrients, and irrigated, which sounds like it would be better, but can actually stress the native plants instead.
2. Root Growth
Native perennials often prioritize root system development over top growth in the first year or two, so they may look sparse or stunted as they establish. This can be frustrating to a gardener who expects to see lush foliage or blooms as instant gratification. But the plant is busy growing a strong root structure below ground, which is why it seems so weak or unimpressive above ground.
3. Competition
Gardeners frequently mix natives into a bed with other perennials or shrubs, and perhaps some turfgrass. Aggressive ornamentals or invasive weeds can easily crowd out slower-establishing natives, especially if the transplants are small seedlings or plugs.
4. Water Needs
There is a paradox with watering native plants. Most natives are drought-tolerant once established, but they still need regular moisture early on while becoming established. A common mistake from gardeners learning how to go native is to assume they no longer need to water because “natives take care of themselves.” A transplant can quickly fizzle out in the first year without that extra attention. On the other hand, too much water or poor drainage is a death sentence for species adapted to dry, open habitats.
5. Wildlife
Ironically, because native plants are so beneficial for local ecosystems, deer, rabbits, or insects often find them and browse on them immediately after planting. While this is a good thing for the environment as a whole, it can stress out a young plant to the point of death at the establishment phase.
All of these issues combine to make a steep learning curve for those who are enthusiastic about transitioning to a native plant garden. Many give up too soon and assume natives just “don’t work” in cultivated yards. But there is a solution, and with a little patience and effort, the results are truly rewarding.

The Solution: Right Plant, Right Place–and a Little Patience
So, how can you overcome the challenges of transitioning native plants into a garden? It comes down to thoughtful preparation and realistic expectations. Here is the solution that has worked for many native plant gardeners, landscapers, and restoration specialists:
1. Choose Native Plants that are Suited to the Conditions of the Garden
The best solution is to follow the common gardening mantra of “right plant, right place.” Rather than trying to modify the garden bed to suit the plants, choose plants that naturally thrive in the conditions present. This means that:
If the site is clay soil and full sun, prairie natives such as purple coneflower, switchgrass, and blazing star are more likely to thrive than woodland plants.
For shady, moist areas, woodland natives like Solomon’s seal, wild ginger, or foamflower are the right choice.
Dry, sandy areas will be more successful with butterfly weed and little bluestem than moisture-loving plants.
Honoring the plant’s natural habitat preferences reduces stress and gives the plant the best chance at quick establishment.
2. Prepare the Soil Carefully
Rather than heavily amending the soil of a new bed with compost or fertilizers, which can overwhelm native species, lightly loosen the area you are planting and pull out aggressive weeds. Adding leaf mold, pine needles, or wood chips can help mimic the forest duff native to woodland species. For prairie plants, less is more in terms of soil amendments. Lean, well-draining soil is best.
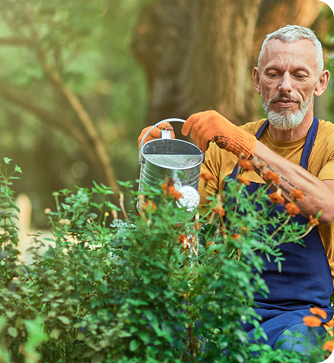
3. Water Consistently in the First Year
The key to a successful transition of native plants into a garden is watering during the first growing season. A deep soak once or twice a week is usually better than daily light watering. After the first year, most native plants can take care of themselves, but this critical care helps them transition from transplant shock to long-term survival.
4. Mulch to Reduce Competition
Mulching around new transplants not only helps reduce weeds competing with them but also holds in soil moisture and provides insulation against temperature swings. Just pull back the mulch a few inches from the crown of the plant to prevent rot.
5. Have Patience
Patience may be the hardest part of the solution, but it is also the most important. Remember that the typical timeline of “sleep, creep, leap” is:
Year 1 (Sleep): The plant is busy growing roots. Top growth is slow and limited.
Year 2 (Creep): Plants start to look fuller, producing more shoots and some flowers, but still not very showy.
Year 3 (Leap): Plants are now fully established and will spread and produce more blooms each year.
Understanding this timeline helps a gardener have more realistic expectations and stick with the process long enough to see results.

A Practical Example
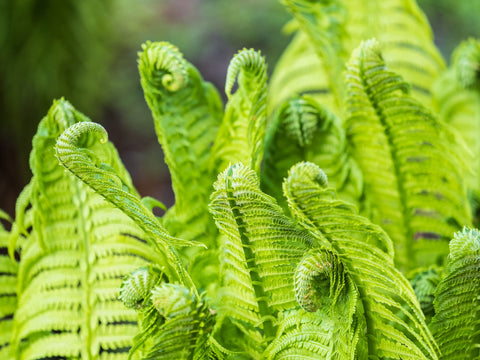
A few years ago, I decided to convert a section of my sunny lawn into a native pollinator garden. I selected a variety of species, including butterfly weed, black-eyed Susan, and little bluestem, all known to be well-suited to my region’s dry, sandy soil conditions.
The first summer was a bit discouraging. The butterfly weed looked spindly and small, the bluestem hardly emerged, and I spent hours weeding a persistent pack of invaders that seemed to take over the bed. I was frustrated and wondered if I had made a mistake. But I persevered and stuck with a routine: deep watering once a week, regular weeding, and a light layer of mulch to protect the soil.
The next year, I was pleased to see a difference. The butterfly weed had doubled in size and began to bloom, bringing in swarms of monarch butterflies. The black-eyed Susans filled in to form dense patches of bright yellow. By the third year, the little bluestem swayed gracefully behind them, a stunning backdrop that turned coppery-red in the fall. The bed that once looked bare and sad was now full of blooms and buzzing with bees, butterflies, and birds.
There was no magic fertilizer or endless toil involved–just patience, proper plant selection, and diligence in the first year.